There are two main components to administering Cloud licensing and enabling computer connection to use and return licenses:
Civil Survey Solutions Customer Portal - Administration
This portal provides user access to the licenses available at an organisation. Administrators accessing the portal can create user access accounts, as well as view and manage licenses and license consumption
Installation, Activation and Use of Licenses on computers/workstations
Eligible Users connect to the license server to Activate computers and access the license/s
Cloud licenses are managed through the Civil Survey Applications Customer Portal.
To access the licenses, all users must have user (log in) credentials to the Customer Portal.
Initially, Administrator User logins will be provided by Civil Survey Applications when purchasing/upgrading licenses. Administrator User logins are provided to the Primary Contact at the organisation.
Note: Only the Primary and Secondary Contacts for your organisation can be given administrator access to the Customer Portal.
Administrators will be able to:
View and manage the License Keys for the organisation
Create and manage User Accounts to enable end users to Activate computer/s and Use licenses.
Deactivate computers to return licenses
Remove User Accounts to disconnect User Activated computers from accessing license/s
User Accounts created by the license administrators will only be able to view their own User Account and no License Keys.
There are three steps to setting up user access to licenses via the portal:
Step 1 Access the Civil Survey Applications customer portal
Step 2 Set up User access to the portal (and licenses)
If you are a new customer trying to access the Customer Portal, or a User added by your organisation, the process for logging in is the same.
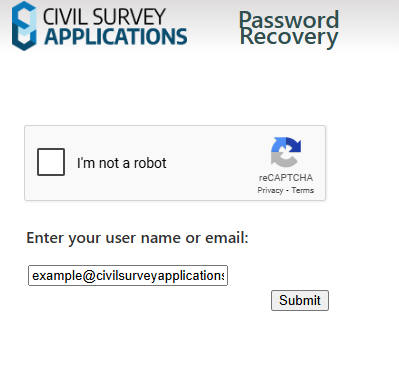
When a new User Account is created a notification will be sent to the registered email with a Forgot Password link to generate and send a temporary password by email:
The Password Recovery page will open in a new browser window and allow you to reset your password after completing the reCAPTCHA and clicking the submit button.
Note: If you receive an error message that the User Account under your email does not exist, please contact your administrator to create your User Account.
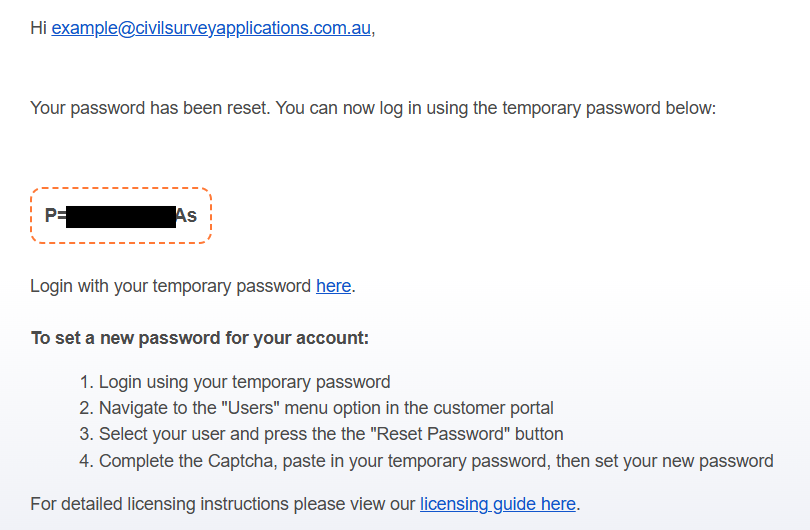
You will receive an email with a new temporary password and link that can be used to log in to the Civil Survey Applications Customer Portal (CSA Customer Portal):
Login to the CSA Customer Portal using your email and the temporary password:
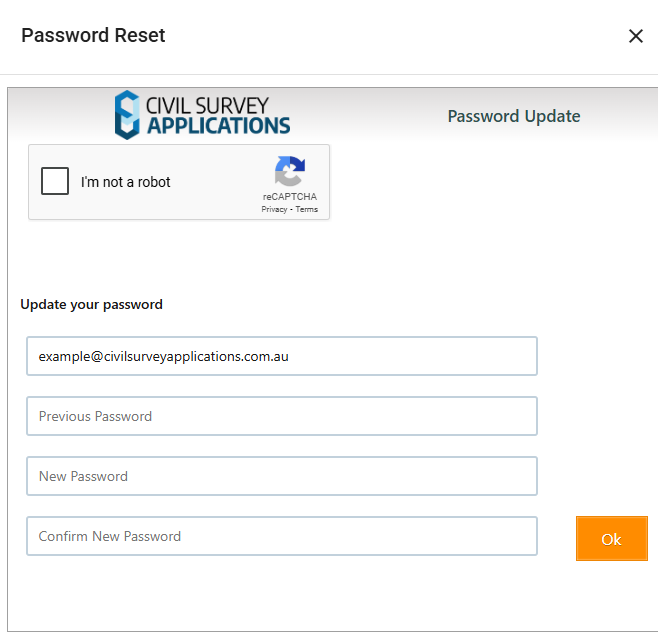
To set your own password, do the following:
Select the Users button on the menu:
Select your User Account from the list and click the Reset Password button:
Note: If you cannot click the Reset Password button, please ensure you have selected a User Account.
Enter the current temporary password that was used to login. After passing the reCAPTCHA and confirming the new password select the OK button to set the new password.
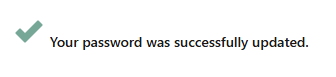
If the new password is sufficiently long and complex you will receive a success message confirming the new password:
The User Account set up and ready to use for Cloud licensing.
This section only applies to the 2 Administrator User Accounts (Primary Contact and Secondary Contact) with administrator access for your organisation.
Only Administrator User Accounts can administer Cloud licenses in CSA products.
After logging in to the Customer Portal select the Users tab from the menu:
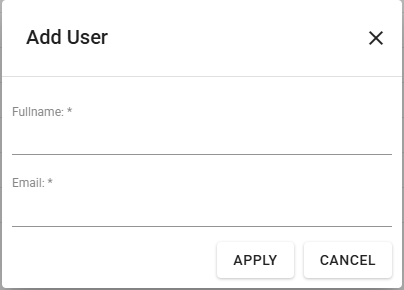
You will then be able to create and manage User Accounts for your organisation. To create a new User Account select the Add User button.
Note: If you do not see any other User Accounts and are unable to create new ones then you do not have administrator access.
You will be prompted for the name and email for the new User Account. The name is displayed in the Customer Portal and the email is used to login to the new User Account.
Select the Apply button to create the new User Account. A notification email will be sent to the provided email address with instructions to login, as shown above in the section ‘Step 1 | Accessing The Customer Portal’.
Note: The Add User window will remain open to allow the creation of additional User Accounts. Close the window when you are finished creating User Accounts.
Note: If you have a large number of User Accounts to create please submit a Helpdesk ticket to have CSA help with your data import.
Removing a User from the Portal will automatically Deactivate each computer that was activated by the User when they next try to run the software. Those computers/workstations will be unable to connect to and Use a license.
To remove a User Account, follow the above 2 steps but select Delete User instead of Add User and proceed with deletion at the prompt.
Important: The product software must be installed on each workstation being connected to the Cloud license. Deployment options are available and described in the Appendix at the end of this document. User Accounts will still need to be configured for users.
Ensure your CAD application is closed.
Run/Start the Software Installation .exe file
After installation of the software, start your platform CAD application and note that additional menus/toolbars/ribbons are installed for your installed Civil Survey Applications software.
Note: Running any command from the added ribbon will trigger the License Activation form.
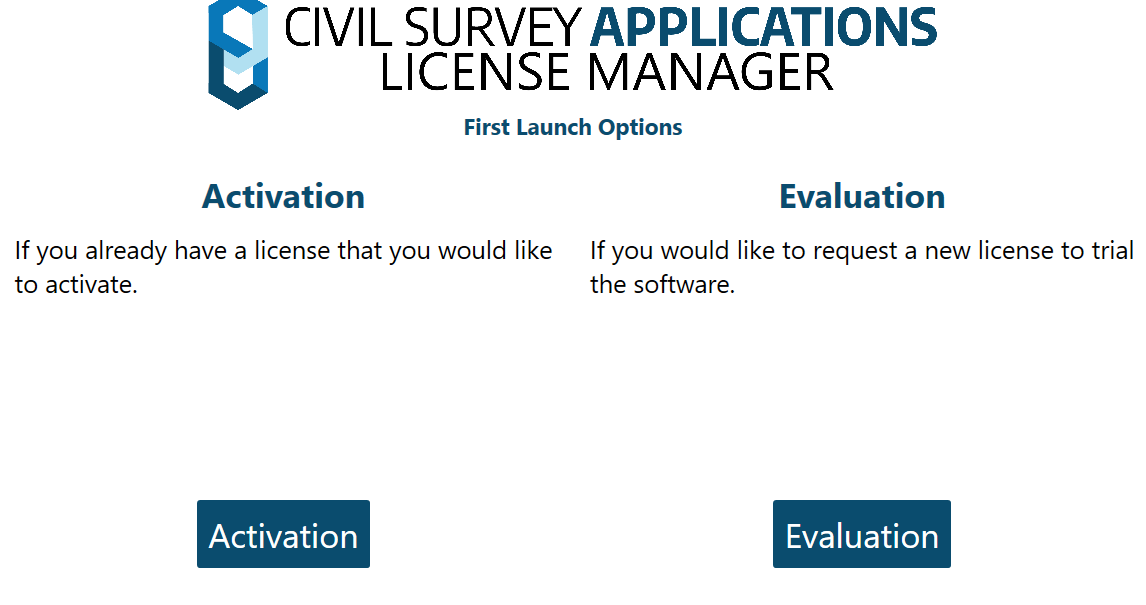
To begin the activation process run any of the product commands, or click on the CSA Licence Manager Icon. This will open the CSA License Manager.
Note: If it is your first time running the product you will see the first launch screen. Select Activation to activate the Cloud license:
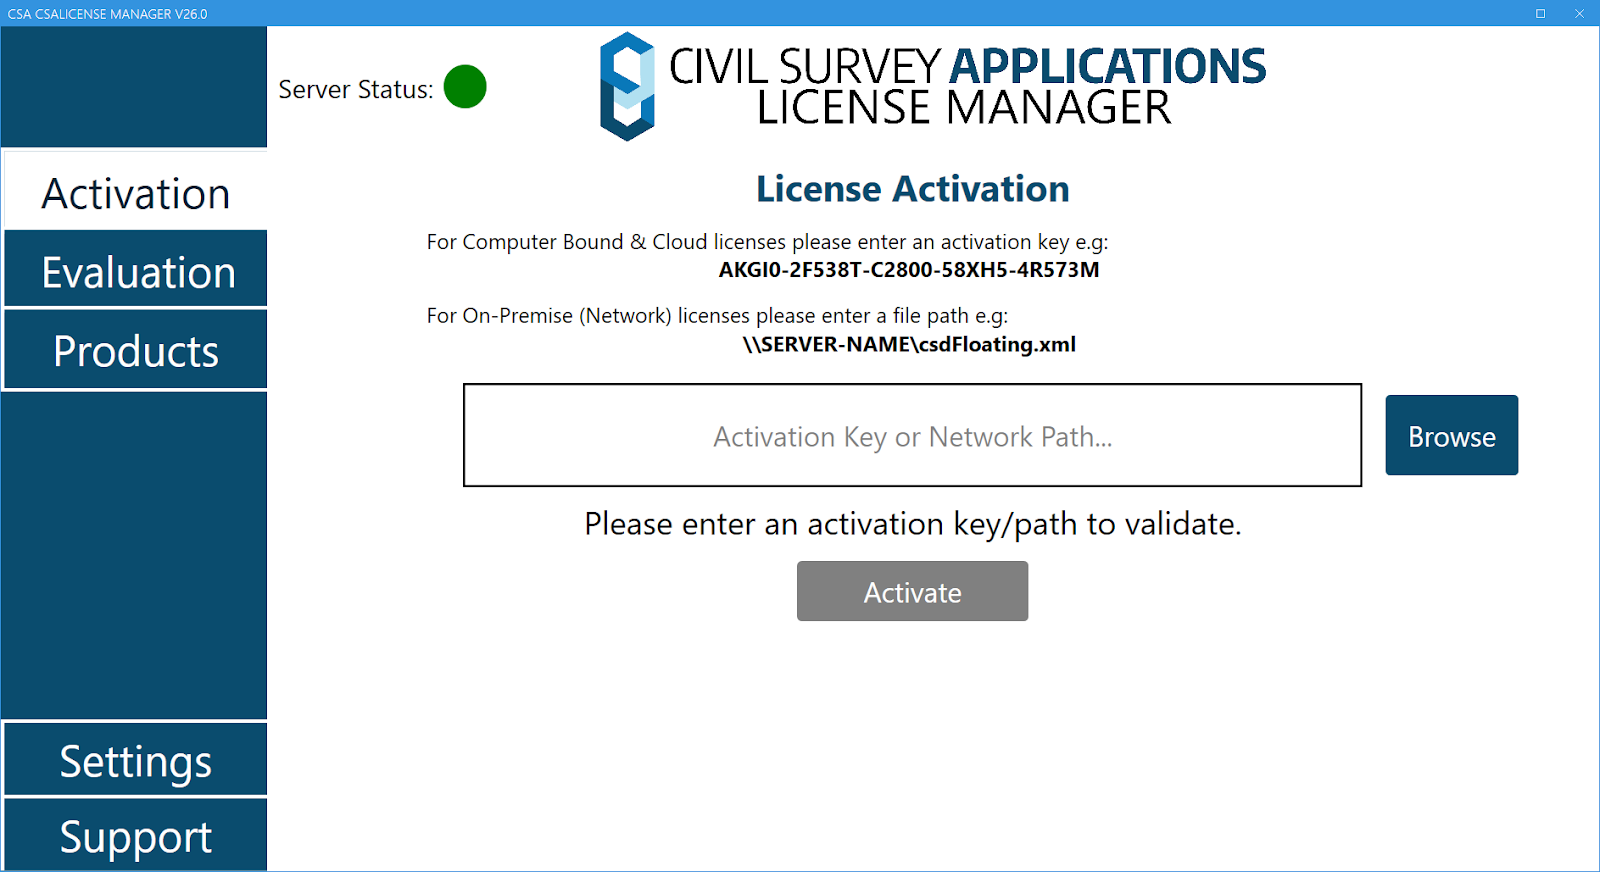
The Activation tab will then be displayed.
Note: The server status icon in the top left will be green if the CSA License Server can be accessed.
Past the License Key provided by CSA for your product.
Note: If you used the deployment options to specify a License Key for the install then it will automatically attempt to be activated on start up.
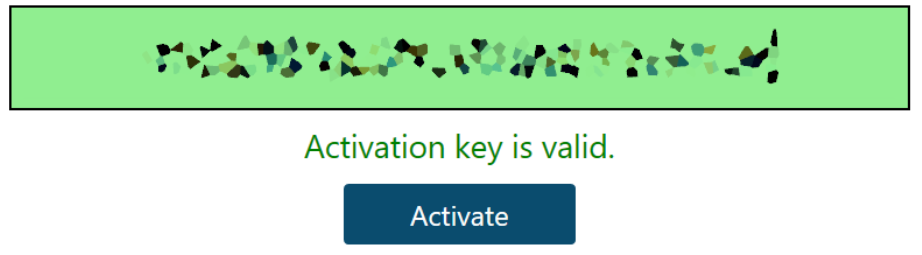
The CSA License Manager will automatically validate the License Key. If valid, you will be able to activate the license using the Activate button:
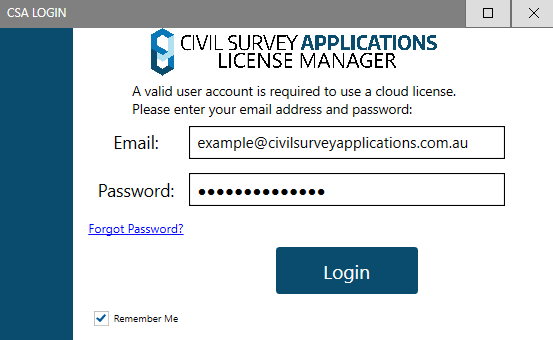
You will be asked to sign in using the same User Account credentials you established in the Civil Survey Applications Customer Portal.
Note: Ticking on the ‘Remember Me’ checkbox will save your email and password to the computer, meaning you won’t have to log in again.
The main difference between single and multi user Cloud licenses relates to Activation of computers.
A multi user Cloud license can be shared between (Activated on) any number of User Accounts and computers.
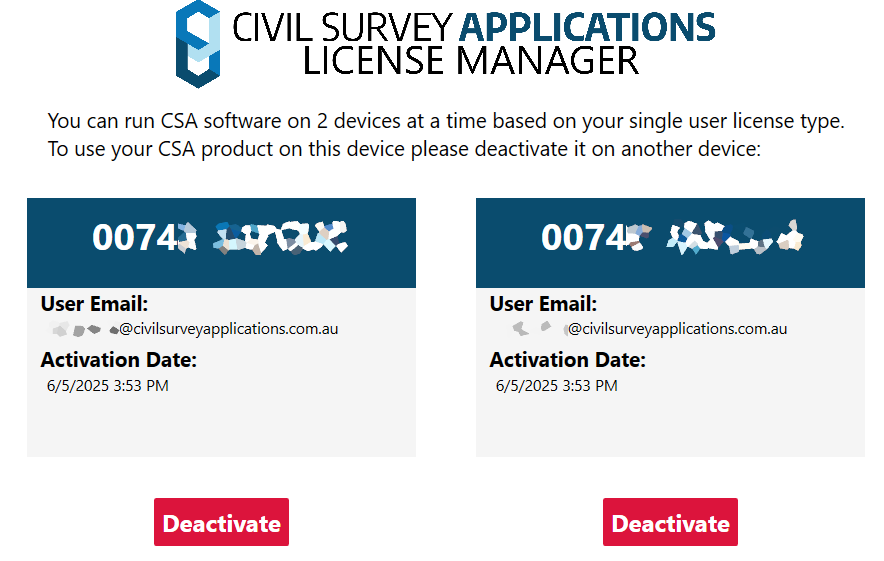
A Single User license can only be used by 1 User Account and can only be used (Activated on) on a maximum of 2 computers.
If you attempt to Activate a Single User license on a third computer, with two already activated, you will be prompted to deactivate another computer before continuing:
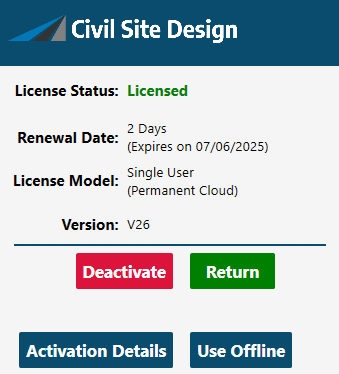
After activation the CSA License Manager will show the license as Licensed (Returned). The status of Returned identifies that the license is not currently being used by this computer.
Note: Various details about the License Key can be viewed on the product tile as shown below.
Your login status is displayed at the top right of the form.
Note: As the access to licenses is tied to your login credentials, logging out of your User Account will deactivate all activated Cloud licenses on the computer.
Please note: Changing your User Account password in the Civil Survey Applications Customer Portal will require you to login again on the computer when next used. If you are unable to login then all of your Cloud licenses will be deactivated from the computer for security. You can Activate again anytime with eligible user login credentials.
The license will not be automatically in Use until a command is run. Using a license will reduce the available licenses on the server by one. The license can also be used manually with the Use button on the product panel.
The Return button on the product panel can be used to return the license from the computer back to the server and increment the available license count by one.
When you close your CAD application your Cloud license will be returned. This returns your license to the licence pool for other users on the same License Key to use.
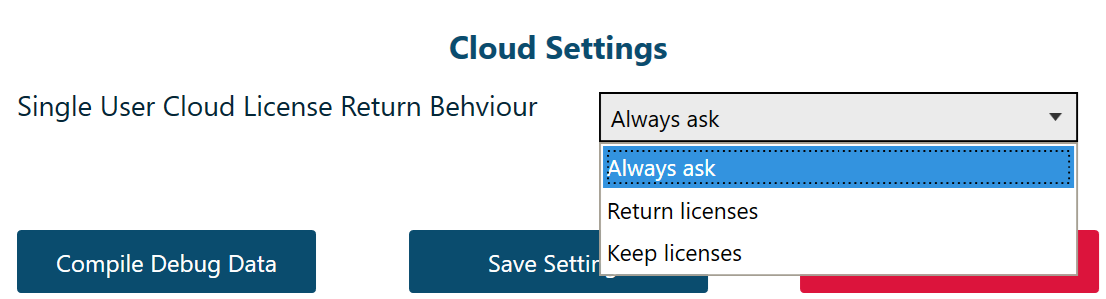
If you have a Single User Cloud license in use when closing you will be asked if you would like to return it to the server:
You can choose from the following options:
Return your Cloud license to the server every time you close CAD, allowing it to be used on another activated computer.
Keep the cloud licence on your computer (So you cannot use your Cloud license on another computer such as at home. This functions as a limited offline license (max 30 days) if you have no connection on startup.)
Note: We do not recommend using offline licenses in this way. If you would like to deliberately take the license offline there is a Use Offline button in the Products tab (Only for Single User Cloud licenses):
You can also remember your choice for how to manage the license when you close the drawing. This can then be changed later from the settings menu:
Return License Issues
If CAD crashes or your computer crashes, your computer will not return the license to the server. When you restart your CAD application the License will still be in Use. You can then close the CAD application or use the Return button in the CSA License Manager form to Return the license.
In the event of computer hardware failure while your CAD application was open and a license in Use, please submit a Helpdesk ticket to CSA for a server side deactivation.
You can Deactivate one computer in order to Activate on a new computer, using that same License Key.
The Deactivate button can be found on the product details within the CSA License Manager on the Products Tab.
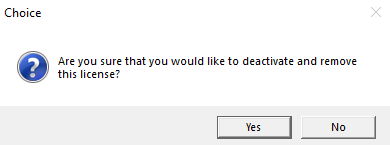
Activated products will display a Deactivate button to enable deactivation and removal of the product. Click the Deactivate button, you will be prompted to confirm the deactivation:
After selecting Yes to deactivate the computer you will be able to Activate (using your login and license credentials) on another computer using the same License Key, by following the Cloud Licenses | Client Installation and Activation section above. If you are unable to deactivate the license from the clients machine you can request us to deactivate it from our server by submitting a ticket